Tuesday, July 31, 2012

Do You Need a Degree in Art?- Pros

Today I'm going to answer a question that I think many young artists ask: Do I need a degree if I'm going to become an artist? And by artist, I mean illustrator, animator, graphic designer, photographer, sculptor, writer, etc. I know I asked myself that very question when looking at schools to get an animation degree from. I asked myself that question my first year of college as well. I'm about to be 3 years in, so it no longer matters if the answer is yes or no because I'm going for a degree anyhow. But I still wonder, how much will this degree help me?

Do You Need a College Degree in Art?

I think that everyone now knows that getting in a degree in this day and age does not mean the same thing as getting a degree "way back when." Nowadays, almost everyone has some sort of degree in something, so having a degree doesn't make you stand out that much. On top of that, because of the Internet, people can learn so many things on their own, or from non-degree online training programs. So will a degree help?

The answer is that there really is no answer. The answer will vary based upon your field, your skills, and your goals. A great self-taught animator is going to be hired over a mediocre animator with a degree. But a lame self-taught animator isn't going to be given a second thought if an awesome animator with a degree shows up. It will all depend on you.

But before you decide to let a coin toss choose whether you go to college or not, consider these pros for getting a college degree in your art field.


College Professor and His Students#1- You'll get great training (for the most part). How well you will be trained will depend on how good your professors are and how much you apply yourself. Don't think that you won't get a good education at a cheaper school. Even fancy art schools can have so-so professors, just as cheap art schools can have awesome professors. There's no way to know for sure until you step into the classroom. Reading college reviews can help, but you may not agree with the masses (some people love professors who don't give much work, which you may not like if you want to learn a lot). Also, the more you practice on your own, and the more you go "above and beyond" (a favorite phrase of my professors) with your assignments will factor into how much you learn.

#2- Some art jobs actually do require degrees. I have come across some animation jobs from studios that ask that applicants have a relevant degree. I haven't seen this all the time, but I have seen it. If you just want to work freelance, you shouldn't have to worry about that as much.

#3- You get a broader education. It doesn't matter what your degree is, trust me, you'll be taking some general art and education classes. My college has writers taking drawing classes, simply because a number of drawing classes make up the required foundation classes for all the majors. Also, I'm majoring in animation, but I have to take many other classes related to other parts of CG animation production. You may either love or hate this.


The Animation Industry#4- You'll get industry experience and information. This will come as a result of your professors (who have always worked in the industry in some fashion or other) telling you what it's like "out there." They can help teach you important work practices that will allow you to mesh more easily into your first real industry job. They, or your school's career services department, can also help you get important industry connections.

#5- You'll have someone helping you get a job. Colleges like to boast high post-graduation employment numbers. They're going to do their best to help you get some type of job, either through their alumni website, job fairs, or other sort of student-only perks.

#6- You'll have a degree. If you're a bit old-fashioned when it comes to education like I am, you'll be happy with the feeling of security that will come with a degree. I would have loved to try some non-conventional education methods, like doing the Animation Mentor program, but I don't have the courage. I get really nervous at the idea of not having a degree. I've seen those charts that compare the income of a person with a degree and a person without a degree. I worry about being part of that lower line (though those charts never seem to show the incomes of people in art fields).

Tomorrow I'll discuss the cons associated with getting a college degree in art.


Monday, July 30, 2012

Interactive Art Word Search Puzzles

Take some time off from all your hard creative work with these interactive word search puzzles I made (with art related words, of course)! I'll get back into discussing serious art topics tomorrow. You can make your own puzzles like these here. Click on a letter to begin, drag your cursor over the word, then click on the last letter to end the selection (it should get crossed out in the word bank). It looks like whatever runs these puzzles is a little buggy, but you should still be able to have some fun. Enjoy!


Famous Artists Word Search


Traditional Art Word Search


Digital Art Word Search

Friday, July 27, 2012

Great Dog Art

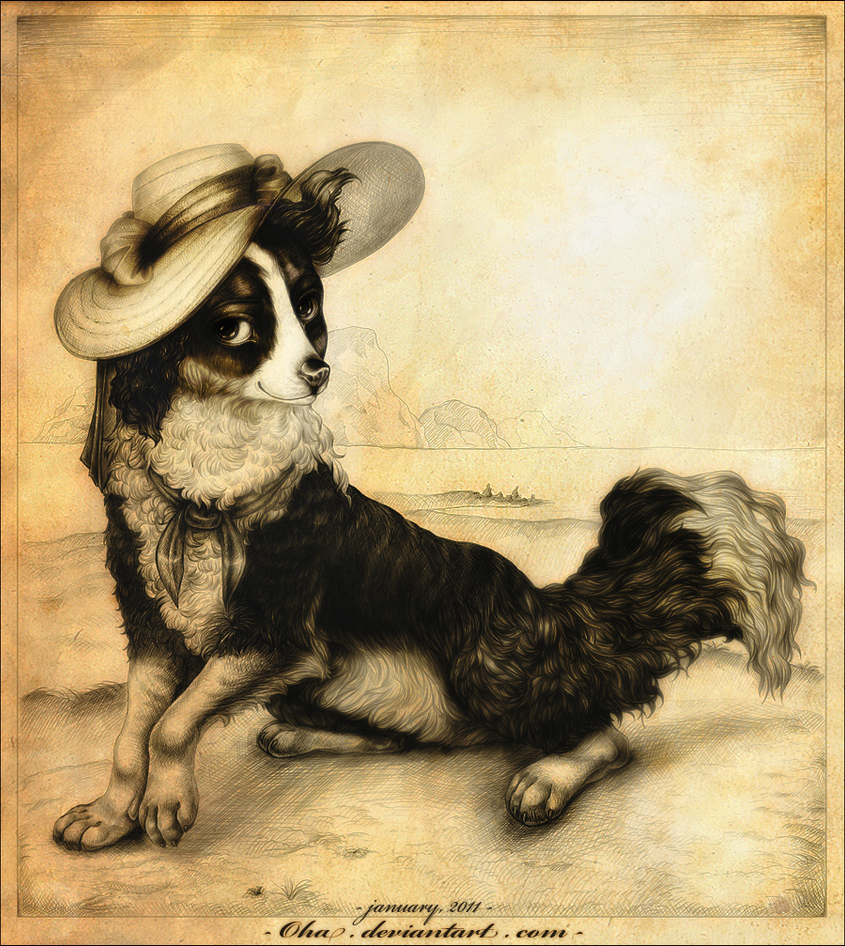
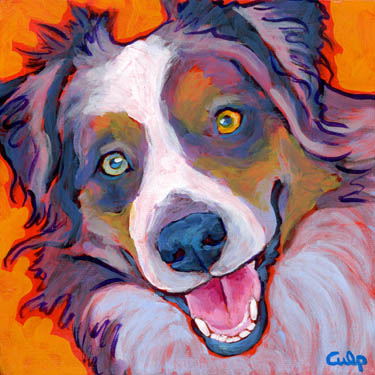
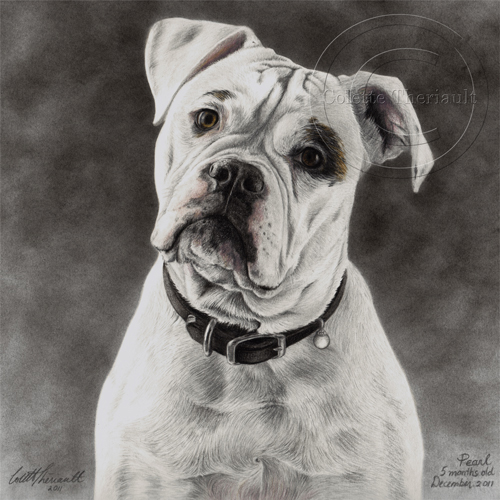
Now that I've covered how to draw animals, how to draw dogs (Part 1, Part 2), and listed 10 great dog art tutorials I found, I'm going to end this dog themed week with some inspirational images. Some of these artists are classical dog drawing masters, while others are living artists. Make sure to follow the link on any images you like to see what else the artist has to offer. Enjoy!

Beagle Painting 

Dog Painting

Dog and Child Painting

Dog Painting

Dog Drawing

Dog Painting

Dog and Child Painting

Pet Portrait Dog Painting

Pet Portrait Dog Drawing

Pet Portrait Dog Art


So I hope this was inspirational! There are tons of other great dog artists out there, so I may have to do a post like this again someday. Until then, you can always follow my Pinterest board "Inspiring Images" where I pin all the great art I come across.

Until next time!

Thursday, July 26, 2012

How to Draw Dogs: The Best of the Internet

Now that I've given my own tips on how to draw dogs in my two part tutorial (Part 1, Part 2) and my tips on how to draw animals, let's take a look at what other people have to say on the subject of making dog art. I've always found that the best way to learn how to do something artistic, aside from practice, is get various perspectives on the subject. However, it can be hard to find any good tutorials that go beyond simple how-tos for kids, which is why I hope this list will be helpful. If there are any good ones you think I've left out, feel free to leave a comment linking to them!

How to Draw a Dog

The Best How to Draw Dogs Tutorials

Please note that in general I don't suggest using tutorials that just teach you how to draw one type of dog in one type of pose, which is why you won't find any here. These can be helpful (and fun) when you're starting out, but you're soon going to want to draw a different dog in a different pose. The only way to learn how to do that is to learn at least some basic anatomy and practice from photos or life (this is how I learned). Step by step how-tos will only take you just so far. I also don't suggest using the grid system, unless you plan on only ever doing pet portraits. It's a very helpful system, but doesn't teach you much about anatomy, which can restrict you later if you want to do any imaginative art.

  1. Canine Anatomy Tutorial- This tutorial by Photografever gives a great introduction to canine anatomy and how to use it in relation to posing, without any major skeleton or muscle study required.
  2. How to Draw and Shade a Dog Sketch- Shows how to use a phot reference, and gives a short discussion how to see form with light and shadow and how to add fur texture.
  3. How to Draw Mammal Legs- A great tutorial by Elruu that explains the do's and dont's of posing animal (mainly canine) legs.
  4. Dog Pose Tutorial- A great guide to dog body language and expressions by SleepingDeadGirl.
  5. Canine Ear Variations- Dalmatianluver drew some great dog ear references, showcasing the many different types from different angles.
  6. Fur Tutorial (Traditional Art) (Digital Art)- Two different tutorials about how to draw fur, since I didn't cover it. These are very detailed and helpful (I've used both).
  7. Basic Animal Anatomy- by Majnouna. There's a canine in the third row, but I suggest you read everything because there is some great information in this guide.
  8. Dog Teeth Tutorial- This tutorial by WolfPearl goes very in depth into things regarding dog teeth. This is a good read if you're studying dog anatomy seriously.
  9. Canine Hind Paw and Forepaw Studies- These aren't exactly tutorials, but if you're wondering what type of art to make when studying dog anatomy, these studies by ArnaThornwolf are great examples. They also are great references of different paw angles and poses.
  10. Canine Anatomy Illustrations- I linked to this collection in my tutorials, but it's so helpful that I'm putting it here, too. This isn't a tutorial, but it is my main guide to animal anatomy (canine anatomy begins on the page with images 37-48; "der hund" = the dog). Using this can save you the money you'd normally have to put into buying a decent animal anatomy book. And seeing as how this came from a veterinary anatomy book, you can be sure all the illustrations are scientifically accurate.

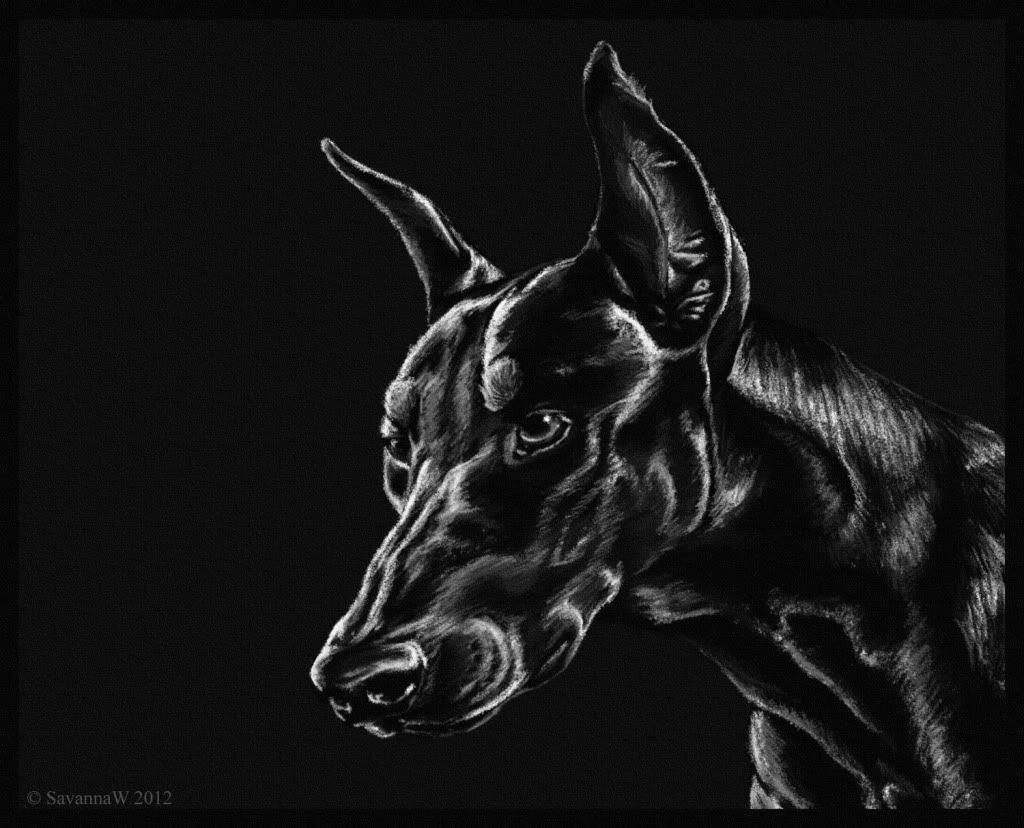
Doberman Digital Artwork
An example of dog art from my portfolio

If you have a tutorial you think I should add, leave a link in the comments and I'll take a look at it. And if you're in need of any dog drawing inspiration, in my next post I'm going to show you tons of great dog art (and great dog artists).

Until next time!

Wednesday, July 25, 2012

How to Draw Dogs: Faces and Bodies

Since this week's theme is dogs, yesterday I covered how to draw dog paws, eyes, and noses, and today I'm going to discuss their faces and bodies. If you are wondering how to get started drawing animals, check out my how to draw animals tutorial. It has videos and a ten step guide for animal drawing.

If you're a new artist, or just want to find some fun new tools or programs to work with, check out my traditional art supply and digital art program recommendations. So, let's get started!

How to Draw Dogs Pt. 2: Face and Bodies

Art Type: Traditional or Digital
I'm Using: MyPaint and an Intuos 4

In this last part of this dog drawing tutorial, I'm going to give you something to put those paws, eyes, and noses on. Just as those details vary in shape, so do dog faces and bodies, but to an even greater extent. Let's start with their faces.

Dog Skull Anatomy
Dog Skull Anatomy

Just as I suggested you study the anatomy behind the dog's paw, I suggest you also study the anatomy of the dog's head. Drawing skulls isn't a morbid activity at all. I find it to be extremely helpful. While I'm limited to photos I find online, you can always buy a fake or real skull that you can turn to draw from all conceivable angles. Let's take a look at some dog faces I drew from photos, keeping in mind the underlying structure.

How to Draw Dog Faces

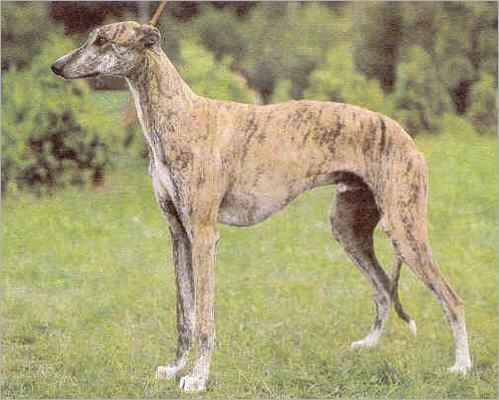
Something you'll probably notice right away is how varied the faces are. Some dogs have pointier faces, some have rounded faces, and other's faces are more square. Also, some have long muzzles, some have short muzzles, and some have practically no muzzle. Long nosed dogs (like the Greyhound) have what is called dolichocephalic skulls. Medium length muzzles (like those on the Pointer) are called mesocephalic. Compressed muzzles (like the muzzle of a Boxer) are called brachycephalic, and really compressed muzzles (like on a Pug) are called extreme brachycephalic. The terms don't really matter, what matters is how these skull shapes make dogs look different.

How to Draw Dog Bodies

Dogs also have very different looking body shapes. And by different, I don't mean just the obvious difference between a Labrador and a Dachshund (though the positioning of Dachshund's legs is very interesting). I'm talking about the more subtle differences as well. Look at these dogs I blocked out and notice some interesting things: #1- Some dogs, like Greyhounds, have deeper chests. This has to do with running and endurance. #2- Some dogs have broader chests. Some breeds, like Bulldogs, are naturally barrel-chested, while some breeders breed dogs like that to make them look tougher. #3- Some dogs have thicker limbs, while other dogs are skinnier. #4- Some dogs are longer than they are tall (the Dachshund isn't the only one, another example is the Cesky Terrier).

Greyhound Dog
Greyhound

Cesky Terrier
Cesky Terrier

By paying attention to all of this, you will be able to replicate dog photos better, and design more interesting dog characters. That's what I think is so great about dogs: they are all so different. You could even play on the differences in their temperaments. Dogs vary from sweet, laid-back, aloof, protective, selfish, etc. Ask any dog owner, and they will give you a list of human-sounding traits that they (probably very accurately) attribute to their dog. Incorporating some personality traits like those into your work will help make your dog art come alive and make you stand out from all the other pet portraitists and dog artists out there.

Reccomended Reading: The New Encyclopedia of the Dog is the reference I've used for all the drawings I made for this two-part tutorial. It's not a drawing book, but it's my go-to reference for all things dog. But you're probably wondering, can't I just Google dogs and get my references and discover fun breeds? Well, you can. But I find that when I Google I tend to get distracted, especially by cute puppy pictures. With this book I can get right to work, and don't have to search around trying to find a proper face angle reference. On top of that, it's easy to flip through it to find interesting new breeds. Lots of people draw Huskies. But how many draw Peruvian Inca Orchid dogs? This book can help you become a more unique dog artist.

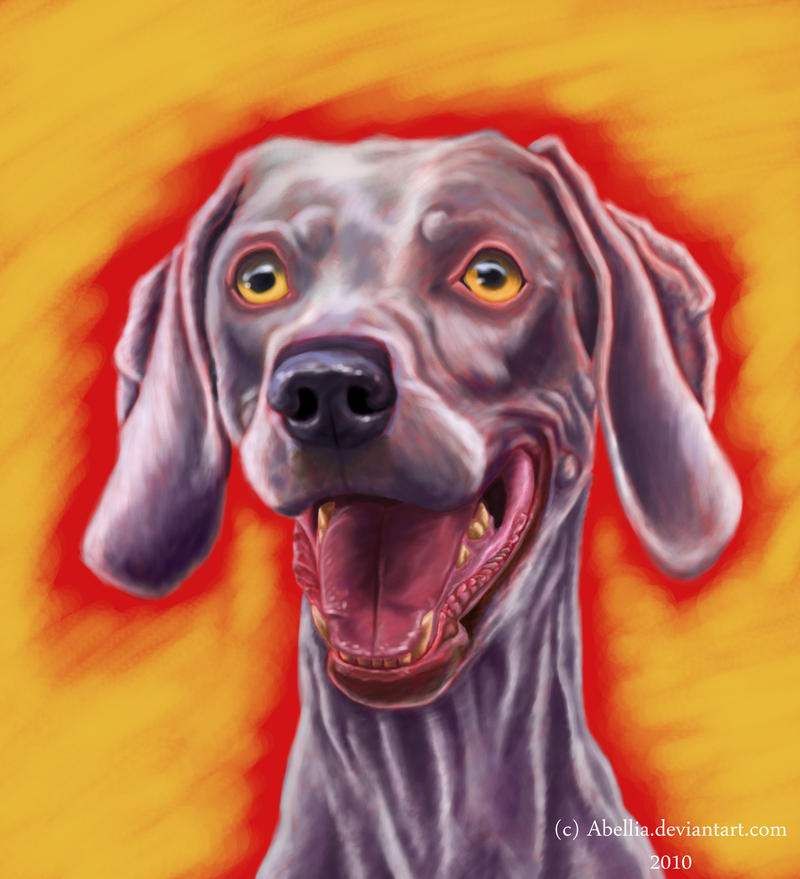
Weimaraner Digital Painting
A good example of lively dog art, from my old deviantART account

In my next post I'm going to list some good dog drawing tutorials that I've found throughout my searches of the Internet. They may go more in depth into some of the things I covered here.

Until next time!

Tuesday, July 24, 2012

How to Draw Dogs: Paws, Eyes, and Noses

Since I've now gone over how to draw animals in general, I'm going to go more in depth into how to draw some of them. This week's theme is dogs.

This post (and the next) won't have as much commentary, because I explained how to draw animals in my last post. This post builds upon that one, pointing out some specific things to be aware of when drawing dogs.

If you're a new artist, or just want to find some fun new tools or programs to work with, check out my traditional art supply and digital art program recommendations. So, let's get started!

How to Draw Dogs Pt. 1: Paws, Eyes, and Noses

Art Type: Traditional or Digital
I'm Using: MyPaint and an Intuos 4

Today I'm going to cover some more detailed aspects of dogs: their paws, eyes, and noses. Just because these are smaller details doesn't mean that they are insignificant. People love dogs' cute noses, big paws, and sympathetic eyes, and if you can draw them well, you'll increase the appeal of your dog art.

Dog Paw Anatomy

To understand dog paws better, you really should take a look at the underlying anatomy. I once spent a full week just drawing dog skeletons and skeletons with muscle, and it helped me tons. I now understand more of the little things, like why dogs' bodies have some of the angles and insets that they do. In particular, I learned how paws are set up, which allows me to place the joints and nails more accurately.

Dog Paw and Leg Anatomy

Let's take a look at some paws that I drew (blocking on the left, finished sketch on the right). Here are some things to keep in mind: #1- Paws are different shapes. Some are long and flat, some are compact and taller. This will vary depending on what the breed was created to do. Back feet tend to be smaller/more compact than front feet. #2- Claws are short nails, of which the middle two point inwards. Don't make them too long or pointy. Dogs' nails tend to be kept clipped in order to give them better traction on hardwood floors. #3- The way a dog's foot looks when he's standing is somewhat different from when he's lying down. Notice how the paw toward the bottom of the sketch page looks curled in more when in the lying pose. This is the result of muscles.

How to Draw Dog Paws


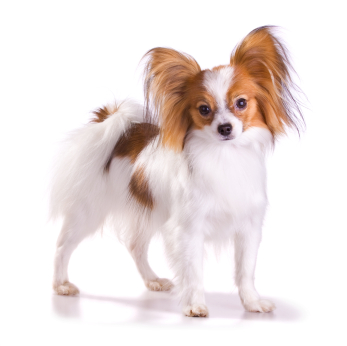
Now let's look at some noses. Dog noses tend to be universal in shape, though they may vary in width and nostril size. They can also vary a bit in color. Look at the nose of a Papillon versus that of a Chesapeake Bay Retriever . Same shape, different colors.

Papillon
Papillon (black nose)

Chesapeake Bay Retriever
Chesapeake Bay Retriever (brown nose)


How to Draw Dog Eyes


Lastly, take a look at the eyes of some dogs (sketches above). These vary a lot and will change what you first think of a dog. Big round eyes make you think they're big sweethearts, slanted eyes make them look more intelligent, and squarer eyes make them look slower and sleepier. Eye color also varies. You'll have a different reaction to a dog with dark brown eyes than to one with shocking blue eyes. If you're designing a dog character, these are important things to keep in mind.

Different Colored Dog Eyes

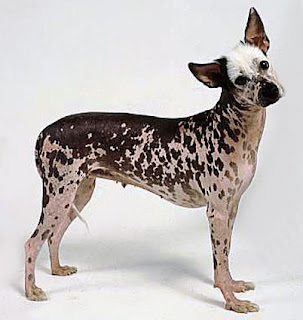
Reccomended Reading: The New Encyclopedia of the Dog is the reference I've used for all the drawings I made for this two-part tutorial. It's not a drawing book, but it's my go-to reference for all things dog. But you're probably wondering, can't I just Google dogs and get my references and discover fun breeds? Well, you can. But I find that when I Google I tend to get distracted, especially by cute puppy pictures. With this book I can get right to work, and don't have to search around trying to find a proper face angle reference. On top of that, it's easy to flip through it to find interesting new breeds. Lots of people draw Huskies. But how many draw Peruvian Inca Orchid dogs? This book can help you become a more unique dog artist.

Peruvian Inca Orchid Dog

Next time I'll discuss dog's faces and bodies, so you'll be able to apply what you learned about these details. In the meantime, search for more dog pictures, and see if you can notice the subtle differences in eye and paw shapes. You might also want to see if you can apply what you've learned to dog ears. Up ears can be simplified down to simple triangles, but they have so many interesting shapes that they can be very fun to draw realistically. The same goes for floppy ears. Take a look at some photos and find some fun shapes. Then try to capture those shapes in your drawings.

Until next time!

Friday, July 20, 2012

How to Draw Animals

Hi, everyone! Today I'm going to talk about how to draw animals. This will be something of a general overview, because I plan on doing many more posts that focus on more specific things, like paws, eyes, etc. (I also don't plan to get into shading today). I'm planning next week to do a series of posts about how to draw dogs and other canines.

If you're a new artist, or just want to find some fun new tools or programs to work with, check out my traditional art supply and digital art program recommendations. Here we go!

How to Draw Animals Tutorial

Art Type: Traditional or Digital
I'm Using: MyPaint and an Intuos 4

Lion and Wolf Drawings
Examples of my drawings

I suggest that, even if you love drawing a single type of animal, you occasionally draw other types as well. I usually just draw canines and felines, but I find drawing a giraffe or walrus once in a while to be a fun change. It also helps to keep me a more versatile artist. You should also try to stay away from just drawing animals' faces all the time (this is something I have to constantly remind myself). Art is so much more fun when you can work with full-body poses, and there are a lot of fun shapes in animals' bodies (I particularly love to draw paws). But enough talking, let's get to the how-to.


  1. Get a good reference, not too small or blurry. Remember you can use Ctrl-+ to zoom in and Ctrl- - to zoom out in web browsers. I have a dual-monitor setup, so I always have a reference off to the side. I tend to work pretty directly from reference, but the more you practice an animal (and the more cartoony your style) the less you'll have to glance at references. You should still start out learning from references, though, to learn some basic anatomy and proportioning.
  2. Identify the basic shapes of the animal. Some animals' heads are like circles, others are like ovals. Shoulders look like kidney beans. Some muzzles look square, others more cylindrical. Take a good look at your reference and find the shapes.
  3. Start drawing with the line of action for full-body drawings (it's usually made up of the spine, head, and tail). This is the direction in which the animal's action/energy appears to be going, like what direction it's jumping in.
  4. Add on a skeleton made of basic shapes (you can skip this if you've got some animal drawing experience). Circles/ovals for heads, ovals for ribcages, sticks for arms, and circles for paws will get you started.
  5. Check your proportions. That's why you start simple, so you won't go crazy if you have to erase a lot. Make sure the head isn't too small or large, stuff like that.
  6. Flesh out the form with more shapes. Tapering shapes for arms, wedges for thighs, etc. You shouldn't have any body parts depicted by sticks now.
  7. Check your proportions one more time. You don't want to be an hour into a piece and realize the body is too short.
  8. Make your blocking out drawing less opaque. If you're drawing on paper, rub over it with a kneaded eraser to lighten your lines. If you're drawing digitally, just lower the opacity of the layer you're on.
  9. Make the detailed drawing. If you're drawing digitally, do this on a new layer. Look for changes in the planes of the animal. Some areas will be obvious, others you will have to learn to see. The more you draw animals, the better you get at finding all their little details. You don't have to go super detailed when making a line drawing. Too many details can make your drawing look too busy, and many subtle things are better represented with shading than with line. Usually you'll add the most subtle details when you shade or color your work.
  10. Clean the drawing. If you're working traditionally, erase all those unnecessary guide lines from when you blocked out the drawing. If you're working digitally, hide unnecessary layers. Look for stray lines, and erase when necessary. You don't have to clean it too much. If you wanted to use the piece as line-art, you'd want to ink over it anyway.

I've recorded myself drawing a three different animals. Take a look at the videos (feel free to just scrub through them, you don't have to watch every second of them if you don't want). I've provided some commentary for each of them, and a link to the image I referenced. After reading and watching all of this, try drawing what I drew, keeping in mind the 10 steps above.

How to Draw a Wolf's Face


Reference here
0:11- Blocking in basic head shape.
0:17- Setting my center guides
0:20- Finding the center of the muzzle
0:25- Giving the muzzle 3D form
0:40- Using the corner of the eye to place the ear.
1:15- Defining the face shape
1:29- Re-positioning the eyes
1:36- Switching to the sketch layer
1:54- Note how I "feel out" the line before I add it.
2:59- Note how I'm okay with going farther in or out than where my guide shapes are
3:20- Realizing that the face needs to be poofier than the guide lines have it planned.
6:15- Super basic shading.

How to Draw a Lion's Arms and Paws

Reference here

Similar things can be seen in this video where I show how to draw a young lion's arms and paws. Pay attention to how I don't allow my blocking lines to constrain me. If I feel something needs to be bigger, longer, or shorter, I draw it that way. The more you work like this, the less often your blocking will be incorrect and you can stay within your guides.

How to Draw a Kangaroo

Reference here

But what if you're drawing an animal that you are not very familiar with? Well, you approach it the same way. You can see how in this video, my blocking shapes are much more scribbley. That's because I'm not as sure of myself, so I go over my lines more as I fix them. But I go through the same steps as in the last two videos, and the end looks fine. With more kangaroo practice, it would look even more similar to the reference photo. Also, it doesn't hurt to spend more time with a piece if you need to. All of these videos were pretty short because the program I was using to record them (Windows Expression Encoder 4) only gave me 10 minutes per video, so I had to draw fast.

How to Draw Animals
Today's sketches
The Art of Animal Character Design

Reccomended Reading: "The Art of Animal Character Design." I got this last Christmas and love it! It's the only art book I have that I've read all the way through. At first glance, it seems to be mainly full of pictures with very little text. The truth is that David Colman gives all sorts of wonderful animal drawing and designing tips in a good concise amount of text, letting his art drive home his points. The beginning has some especially helpful tips about animal drawing, including the most difficult type of animal drawing: drawing from moving animals. I highly suggest it.


So that's it! I hope this overview of how to draw animals was helpful! Next week, I'll do a much more detailed series of tutorials all about how to draw canines (one of my favorite subjects). Feel free to leave comments and questions, and to link me to your work!

Until next time!

Thursday, July 19, 2012

CG Program Recommendations

Welcome to the final part of this three part series of art supply/program recommendations. Last time, I covered digital art programs. Before that, I discussed traditional art supplies. This time, I'm going to cover CG programs that I've had some experience with. I'll be gearing my recommendations more toward how the programs are at making still renders, though I may mention their animation capabilities a bit. Here we go!

CG/3D Programs
There are multitudes of CG/3D programs out there (you'll find people sometimes use CG and 3D interchangeably, since they have come to mean pretty much the same thing). Now while there are lots of CG programs, many by big companies, anyone who's done a quick search will know that there are a few main players. Two of these are the main ones that colleges seem to acknowledge (Cinema 4D and Lightwave aren't on any of my college's computers). The third is one that everyone knows is a strong competitor, though I guess it hasn't become "industry standard" enough to get into college classes. So first, the industry standard ones.

Maya
Autodesk MayaIn my current universe, Autodesk Maya holds the title of Queen of All Things CG. Every CG class I've had so far used it, there are tons of tutorials, tons of websites, and tons of examples of it being used to make films. It can be buggy at times, but patches eventually come out and all is the right in the CG world again. I personally love animating in it (more so than animating in Blender), but I currently like modeling in Blender more. This could just be because I've spent more time practicing animating in Maya and more time practicing modeling in Blender. All in all, I think it's an awesome program. If you're a student, check out my post on how to get Maya for free. Because it costs thousands, if you're a hobbyist, I suggest you start with Blender. And if you've been using free programs and want to move up to an industry standard you can get Maya on Amazon and from Autodesk (the $500 difference is a subscription fee that you'd have to get after purchasing the program from Autodesk, so the prices are actually the same). Keep in mind that often there are only small differences between the versions (they do come out every year), so you may want to consider buying an older version to save some money.

3Ds Max
Autodesk 3Ds MaxAutodesk 3Ds Max is another great CG program (I've played around with it a bit). I think that the reason people often have trouble deciding between Autodesk Maya and Autodesk 3Ds Max is that they are both all-in-one CG programs from the same company. Why Autodesk has such similar programs, I don't know. I actually truly don't know the difference between them. The way I've always understood it is that Maya is used more often for movies, while 3Ds Max is used more often for games. Of course, there are many exceptions to that. Whatever it's made for, people seem to love 3Ds Max, so I suppose I recommend it if you find something that it does that Maya can't do (or if you're going to focus on games). You can get it on Amazon and from Autodesk.

Blender
Blender
This is one of the biggest CG programs out there, and it's totally free. I used it for several years before getting into college and being eligible for the free version of Maya. I still use it often now. It may not be "industry standard" but it certainly could be. The Blender Foundation has shown that a number of times with its animated shorts, and many professionals and small studios use it for commercials and other such things. I actually know of a couple of people who left the industry standard programs mentioned above for Blender.It has fur/hair, cloth, fluids, and all those other things you find in the "professional" programs. It also has a lot of tutorials available, including books and DVDs. On top of that, it has a built in video editor, so you don't even need something like Adobe After Effects to finish your animations off (you need After Effects, or something similar, if you render animations out as individual frames, which is recommended opposed to rendering single video files). You can use the Blender video editor with videos and frames from other sources (so you could use it with Maya or 3Ds Max). You can get Blender here.

Mandelbulb 3D
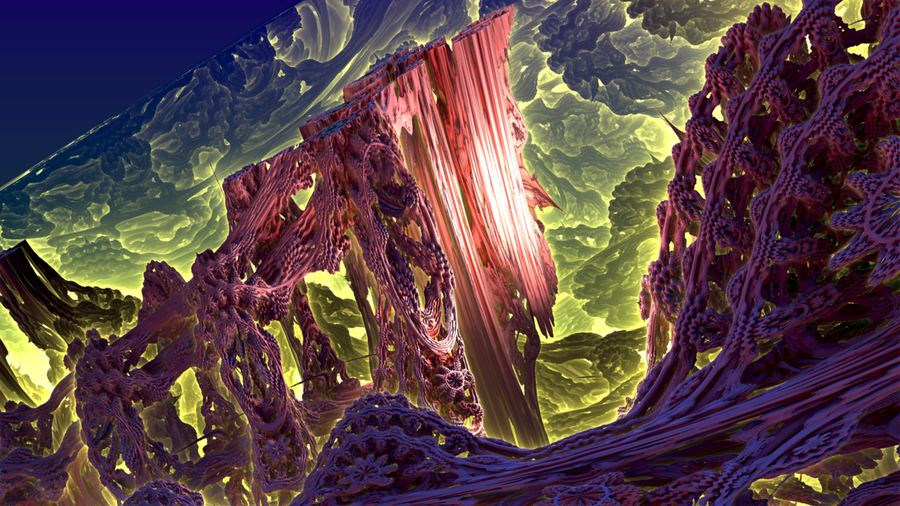
Mandelbulb FractalThis free 3D fractal program is kind of a digital art program and CG program rolled into one. You interact with 3D fractal objects, and have to render your image out like you do in a CG program, but it's not as functional as a true CG program. You can't import models (though I've heard a few ideas about exporting models), and coloring and lighting abilities are somewhat limited. Also, navigation in 3D isn't that easy. But given that it was made by one person (Jesse of fractalforums.com) and is free, it's pretty awesome. It's functional enough for tons of people to be making beautiful 3D fractal art with it right now, and I'm sure that it'll continue to grow. I've used it quite a lot recently, and am looking forward to working with it more in the coming months. You can get it for Windows here (this is the one I use), and a similar program called Mandelbulber for Linux, Mac, and Windows here.

DAZ Studio
DAZ Studio/Poser
I've never tried Poser, but I have DAZ Studio. I know that there are some people out there who love those programs, and there are some people out there who don't think renders made with them deserve as much attention as they get. This isn't because the programs are bad, they are actually great, but the problem is that you are using pre-made content. With Maya, Blender, etc. you make your own stuff from start to finish, then render it. With DAZ and Poser, you buy stuff from the companies, arrange and pose it (though you can buy poses too), then render it. You're not relying on your own modeling, texturing, and rigging skills. Some great renders can be made with these programs (I get the DAZ newsletter, and there are always stunning renders making up the ads). However, because it is so simple and user friendly, a lot of people seem to feel they don't need to work with their images as much, creating a lot of bland, obviously CG images out there. Because it is not an all-in-one CG program like Blender or Maya, I think they approach it from a more playful mindset and feel that they don't need to read up on fancy texturing and lighting techniques. Of course, there are many exceptions to this rule (I've come across some great renders on deviantART).

PoserSo with all that said, do I recommend these programs or not? The answer is yes and no. Yes, if you are just a hobbyist and don't mind having to pay every time you decide your character needs a new outfit or a new hairstyle (you can find some free things, both from the companies and from users, and you can customize the models in other CG programs). These programs can be a great introduction to CG and can teach you how to effectively pose, set up appealing compositions, and appropriately light your scenes. Also, they can be helpful if you need a drawing reference for a pose but can't find any stock footage (I occasionally use DAZ for this). I do not suggest them if you plan on becoming very serious about CG. They are not used in any visual effects houses, so knowing them isn't much of a plus on your resume. Also, it's much more impressive (I think) to show off something that is wholly your own, made from scratch. Lastly, unless you start customizing the models, you may become constrained by what is available for you to buy. And if you're customizing the models, you might as well take the next step and start making your own things from scratch. You can get DAZ Studio here for free, Poser 9 here and Poser Pro here . Be aware that these are not good animation programs (at least DAZ isn't, because I've tried). They are very simplistic when it comes to animation (annoyingly so, I think). Many of the awesome animations you may see on Youtube come from people buying motion capture animations from the companies and applying them to their characters.

Renderers
NOX rendererOnce you get comfortable with a CG program, you may decide to go find different renderers. This is not at all required to make great CG art, since all the programs tend to ship with awesome renderers already installed. But it never hurts to try some new ones out, because you may find some that you like better. The only ones I've ever used were YafaRay and Luxrender for Blender, but that was back before Cycles came out. I don't know how necessary they are now, because of Cycles, so I'm not going to actually recommend any renderers. However, here are some that I know of that seem worth a look: YafaRay (for Blender), Luxrender (Blender, 3Ds Max, SketchUp C4D, Daz Studio, XSI, and Poser), Aqsis (for many programs I think, though I think you may need the MOSAIC plugin for Blender), Pixar's Renderman (I think it works with most all the big CG programs, and I've seen it on Maya in my college), and NOX (3ds Max, Blender).

So, that's the end of this series of recommendations! I hope it has been helpful. As always, if you agree or disagree with my recommendations, leave me a comment! In my next post, I'm going to cover how to sketch animals. You can see some of my sketches on my Tumblr.

Until next time!