Hi guys! This will be my last post on this site. That's because I've finally gotten myself a real .com site- SavannaWilliams.com. I had to wait two years for the domain to become available (there's more than one Savanna Williams in the world) but I finally got it and set up a nice new theme. So from now on, all my animation, art, and career updates will be posted on SavannaWilliams.com.
I hope to see you guys there!
Showing posts with label blog. Show all posts
Showing posts with label blog. Show all posts
Monday, December 15, 2014


Tuesday, December 2, 2014
I'm Now an Intern!
I have great news to share! Today I accepted a remote 3D animation internship position at Kashmir World Foundation! I'll be working with a team of animators to animate characters in videos promoting the foundation's various projects. The ideas for the videos sound very interesting, so I can't wait to start working with everybody!

If you haven't heard of the foundation, you should stop by their website. KwF is doing some great things, especially with 3D printed drones. Take a look!
I don't know when our first animation project will be finished, but I can't wait to show it to you guys when we release it to the public!
Until next time!
- Savanna
If you haven't heard of the foundation, you should stop by their website. KwF is doing some great things, especially with 3D printed drones. Take a look!
I don't know when our first animation project will be finished, but I can't wait to show it to you guys when we release it to the public!
Until next time!
- Savanna
Wednesday, September 24, 2014
I'm an Animation Mentor Graduate!
I got my diploma in Advanced Studies in Character Animation! I'm now officially an AM alumnus!

I'm very excited to be graduated, but I'm also sad that AM is over. But I'll keep visiting the online campus, and I plan to keep on being a Peer Buddy, so I'll still be a part of the AM community.
Animation Mentor was such a great experience, and I finally feel that I have the skills I need to be a working animator. Now all that's next is to finish polishing up my reel, and then I can start applying to studios!
Thursday, July 24, 2014
The Monsters: Bottle Battle- Animated Short Released
My CG animated short is finally released to YouTube! Check it out below, and please like, comment, and share if you enjoy it!
The short was 2 months in the making as a personal challenge to see if it was possible to create a full CG short in that time period. To complete my goal within that time limit I had to animate 30 shots in 30 days (the fastest I've ever animated). In Animation Mentor we have several weeks just to animate one 10 second shot, so this was a great exercise in animation speed. As a result, I'm much faster now! I also learned more about every other stage of CG film production from storytelling, camera angles, layout, lighting, rendering, and (of course) a lot of animation things. I especially got a lot practice animating all that running (I didn't use any run cycles). In the end, it's not my most polished work (you can see my most polished work in my demo reel) but I'm happy with what I created in the time I allowed myself.
If I got to do it all over again, there are dozens of things I wouldn't do and dozens of things I would. But that's just hindsight being 20/20, so I'm going to leave this alone (except for maybe polishing up a shot or two for my reel) and am thinking up my next short! I won't start it until after I graduate from Animation Mentor (which will be soon, it's currently week 4 of my last 12 week class). I want to get my demo reel all together and sent out first. Then I can work on the next short to distract me while I wait to hopefully hear back from studios.
I figure I'll probably always be working on a short, even once I get into a studio. It's just a fun thing to do, getting to tell a full story and play all the roles in its creation. Though it would be nice to collaborate with a person or two (and would probably produce a nicer result, especially if they know about all the non-animation things that I'm still learning about). I highly suggest that every CG artist create a short of some sort, either by themselves or with friends. It doesn't have to be a 12 month production, it can be a short 2 month production like mine. That way you can learn what not to do and what you need to improve on in a short amount of time.
If you've made a short, or are currently making a short, mention it in the comments below!
The short was 2 months in the making as a personal challenge to see if it was possible to create a full CG short in that time period. To complete my goal within that time limit I had to animate 30 shots in 30 days (the fastest I've ever animated). In Animation Mentor we have several weeks just to animate one 10 second shot, so this was a great exercise in animation speed. As a result, I'm much faster now! I also learned more about every other stage of CG film production from storytelling, camera angles, layout, lighting, rendering, and (of course) a lot of animation things. I especially got a lot practice animating all that running (I didn't use any run cycles). In the end, it's not my most polished work (you can see my most polished work in my demo reel) but I'm happy with what I created in the time I allowed myself.
If I got to do it all over again, there are dozens of things I wouldn't do and dozens of things I would. But that's just hindsight being 20/20, so I'm going to leave this alone (except for maybe polishing up a shot or two for my reel) and am thinking up my next short! I won't start it until after I graduate from Animation Mentor (which will be soon, it's currently week 4 of my last 12 week class). I want to get my demo reel all together and sent out first. Then I can work on the next short to distract me while I wait to hopefully hear back from studios.
I figure I'll probably always be working on a short, even once I get into a studio. It's just a fun thing to do, getting to tell a full story and play all the roles in its creation. Though it would be nice to collaborate with a person or two (and would probably produce a nicer result, especially if they know about all the non-animation things that I'm still learning about). I highly suggest that every CG artist create a short of some sort, either by themselves or with friends. It doesn't have to be a 12 month production, it can be a short 2 month production like mine. That way you can learn what not to do and what you need to improve on in a short amount of time.
If you've made a short, or are currently making a short, mention it in the comments below!
Thursday, July 3, 2014
Announcing "The Monsters"- My Upcoming Animated Short Film!
I'm happy to announce that "The Monsters," a CG short film I've been working on for over over a month now, is going to be coming out sometime this month! I say "sometime" because I'm still working on it. I'm in the latter stages of animation, but still have plenty of work to do, never mind the lighting and rendering (I'm using image based lighting and final gather with Mental Ray, so each frame takes a decent amount of time). Anyway, here's the first promo poster!

It'll be about 2 and a half minutes to 3 minutes long and, as the poster says, is an action-comedy. I can't really say too much without giving it all away (3 minutes takes a long time to animate, but a short time to watch). However, I will say that the possible subtitle for the film is "The Bottle Battle." It should be fun! There's no dialogue, just a lot of physical humor due to some conflict between the characters. It's kind of like one of the old Road Runner or Sylvester and Tweety cartoons.
 |
| Work in Progress Screenshot from Maya |
I'm not doing it for Animation Mentor or anything (though the characters are the AM rigs Monster Ball, Bird Ball, and Twig). It's a personal challenge I've set myself to see if (A) I can make a short all on my own, and (B) how fast I can do it. Which is why I'm using pre-existing rigs and several free props, along with the props and set that I made, to help speed it all up.
 |
| Work in Progress Screenshot from Maya |
It's been quite a challenge so far, but I've learned/improved a lot at so many different things that it's been worth it. I've gotten a lot faster at animating, which is good since my last class gave us 11 weeks to make a 15 second 2 character dialogue. That's fine for school (and actually really good since you have the time to slow down and learn) but in a real production environment you have to work a lot faster than that, which is what I'm trying to train myself for here. And on top of that, it's just fun to be able to produce animation faster because you get it out of your head and onto the screen quicker.
Anyway, I'll keep this blog updated about the film's progress through the last few weeks. When it's finally released, you'll be able to find it on my YouTube channel.
Until next time!
Friday, June 27, 2014
Hand Practice Animation
Check out my new animation- a hand practice piece I did a few weeks ago. I did it while working on my AN05 Advanced Acting dialogue assignment because I was having trouble with the hand poses. It's based on webcam footage I filmed of myself making various hand gestures. Since I'm on break this week, I polished it up and rendered it out (using some of the lighting things I've learned from Digital Tutors). Doing this helped my hand animation skills a lot! I learned more about creating nice hand poses, getting into and out of those poses, and holding the poses while still keeping the hands "alive." I also thought it was interesting how the forearm and upper arm responded to the movements of the fingers/wrist.
Anyway, here's the animation! If you want to see my animations as soon as I upload them, subscribe to my YouTube channel.
Animated in Maya 2013, rendered with Mental Ray.
Anyway, here's the animation! If you want to see my animations as soon as I upload them, subscribe to my YouTube channel.
Animated in Maya 2013, rendered with Mental Ray.
Monday, June 23, 2014
New Progress Reel- Animation Mentor Class 5
I just finished Animation Mentor Class 5- Advanced Acting! All I have left is to take Class 6- Polish and Portfolio, and I'll be an AM graduate!
I considered putting my AN05 animation into a new demo reel (my current one is here), but decided to wait. I decided that because #1: I want to re-render all these shots since I've been learning more about lighting with Digital Tutors (I got 1 free month for entering the CG Student Awards). And #2: I'm going to start revising many of these shots in AN06 in just 1 week. So I decided I'll wait until the end of Class 6 to upload a new demo reel.
It'll be nice to be able to go back and rework these shots in AN06. I've learned so much the last few months that already several things stand out to me, especially in my AN02 and AN03 work. I may even get to make a whole new shot/sequence in AN06, depending on what my mentor decides. Either way, it should be fun, and I'll graduate with a great looking demo reel!
But that'll be about 13 weeks from now, so in the meantime, here's my progress reel! It's pure Maya 2013 playblast animation, no rendering, no extra music, etc. Again, if you want to see my prettier demo reel (with rendering and music, but minus my AN05 animation) you can see it here: http://youtu.be/ClDsJu92_88 .
I considered putting my AN05 animation into a new demo reel (my current one is here), but decided to wait. I decided that because #1: I want to re-render all these shots since I've been learning more about lighting with Digital Tutors (I got 1 free month for entering the CG Student Awards). And #2: I'm going to start revising many of these shots in AN06 in just 1 week. So I decided I'll wait until the end of Class 6 to upload a new demo reel.
It'll be nice to be able to go back and rework these shots in AN06. I've learned so much the last few months that already several things stand out to me, especially in my AN02 and AN03 work. I may even get to make a whole new shot/sequence in AN06, depending on what my mentor decides. Either way, it should be fun, and I'll graduate with a great looking demo reel!
But that'll be about 13 weeks from now, so in the meantime, here's my progress reel! It's pure Maya 2013 playblast animation, no rendering, no extra music, etc. Again, if you want to see my prettier demo reel (with rendering and music, but minus my AN05 animation) you can see it here: http://youtu.be/ClDsJu92_88 .
Wednesday, December 4, 2013
Great Bear Art + How to Draw a Bear Video Tutorial
I recently saw the trailer for Disneynature's "Bears," and ever since have been inspired to draw bears. They're such cool animals. They're massive creatures, and can be quite ferocious, but can also be so loving and kind. I'd love to animate one, because they also have a unique gait.
So since I'm so fascinated with bears right now, I decided to make a drawing tutorial on how to draw a brown bear's face in a 3/4th view. I've also collected a number of great bear artworks to help inspire your own bear drawings. Enjoy!


So since I'm so fascinated with bears right now, I decided to make a drawing tutorial on how to draw a brown bear's face in a 3/4th view. I've also collected a number of great bear artworks to help inspire your own bear drawings. Enjoy!
How to Draw a Brown Bear's Face- Easy Drawing Tutorial
Subscribe to me on YouTube for more drawing tutorials!
Great Bear Art
Tuesday, December 3, 2013
Great Christmas Dog Art + Drawing Tutorial
It's December, which means it's officially Christmas time! Since this is my favorite time of the year, I decided to make a post highlighting some great Christmas dog art. I've also made a tutorial on how to draw a cute cartoon Christmas dog. It would be a great little drawing to include on any Christmas cards you might be sending out this year! I'll be doing more Christmas themed tutorials and holiday art posts, so stay tuned!


How to Draw a Cartoon Christmas Dog- Easy Drawing Tutorial
Subscribe to me on YouTube for more drawing tutorials!
Great Christmas Art
Friday, September 20, 2013
How to Draw Dogs Video Tutorials- Panting and Cute
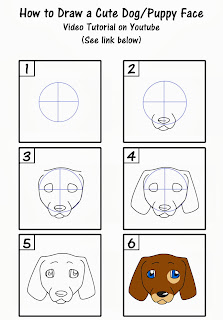
Today's drawing tutorials are a realistic a cute stylized puppy and a panting dog. The stylized one is perfect for beginners or kids, though the panting one isn't that difficult. It just takes a bit more attention to detail and the help of a photo reference. Be sure to check out my other dog art tutorials too!
Cute Puppy
Panting Dog
.jpg "How to Draw a Realistic Dog Panting")
Cute Puppy

1. Make a circle for the head and draw the center lines.
2. Draw the muzzle.
3. Add in the eyes and the top of the head.
4. Add the ears.
5. Add details.
6. Color. Don't forget a highlight on the nose!
.jpg "How to Draw a Realistic Dog Panting")
1. Make a circle for the head and draw the center line. The body is an oval shape.
2. Block out the muzzle, neck, and eye and ear placement.
3. Detail the muzzle and eyes.
4. Detail the bottom jaw and add the collar.
5. Detail the ears and neck.
6. Add some simple values and highlights.
The puppy was drawn in Flash and the panting dog was drawn in MyPaint.
Leave a comment if you have any questions! I hope this was helpful!
Thursday, September 19, 2013
How to Draw Cats Video Tutorials- Cute Kitten and Grumpy Cat
Just in case people who are following me on here aren't subscribed to me on YouTube, I thought I'd start uploading my art video tutorials here again, so they can see them. On top of that, I've made still image/written tutorials to accompany the videos, just in case you want to get the gist of them really quickly.
Most of my videos are recordings of me working through the artwork, so you might want to scrub through them to get a better idea of how the drawing was made. Image tutorials always make things look overly simple, which is why I think that video tutorials are generally better. But you have both to choose from here, so go with whichever you find most helpful! Click the images to see them at full size. And be sure to check out some of my other cat tutorials!
Cute Kitten

.jpg "How to Draw Sketch Grumpy Cat Art Tutorial")
Most of my videos are recordings of me working through the artwork, so you might want to scrub through them to get a better idea of how the drawing was made. Image tutorials always make things look overly simple, which is why I think that video tutorials are generally better. But you have both to choose from here, so go with whichever you find most helpful! Click the images to see them at full size. And be sure to check out some of my other cat tutorials!
Cute Kitten

1. Make a circle for the head and draw the center line. The body is an oval shape.
2. Block out the muzzle and eye and ear placement.
3. Detail the muzzle and eyes.
4. Add in the fur and eyebrow ridges.
5. Detail the ears.
6. Add some simple values and a couple whiskers.
Grumpy Cat
.jpg "How to Draw Sketch Grumpy Cat Art Tutorial")
1. Make a circle for the head and draw the center line.
2. Block out the muzzle, neck, and eye and ear placement.
3. Detail the mouth, nose, and eyes.
4. Add in the fur, eyebrow ridges, and lines to define the sides of the muzzle.
5. Detail the ears and neck.
6. Add some simple values.
Both of these were drawn in MyPaint.
Leave a comment if you have any questions! I hope these were helpful!
Tuesday, August 27, 2013
Factory5 Zazzle Shop!
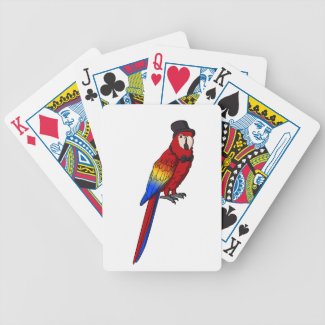
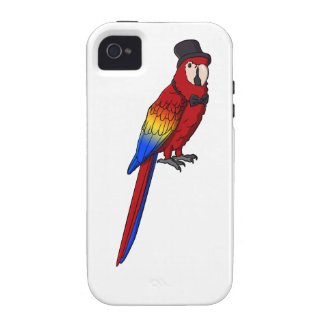
I have a Zazzle shop now! It's called Factory5. It's been open for a few weeks, so I've been able to fill it with a number of designs already. I'm making some products with text designs, and some with my original artwork. I add new products every week, so check back frequently!
The shop features T-shirts, iPhone cases, laptop covers, dog clothes, baby clothes, luggage tags, notebooks, hats, cookie jars, mouse pads, clocks, the list goes on and on!
Here are some of my current products.
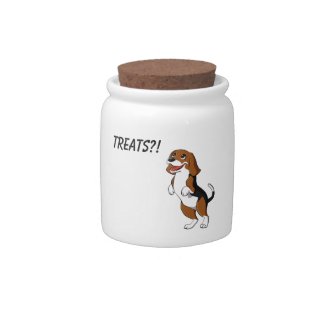
Cute Beagle Dog Puppy Treats Yum Dinner Time Love Candy Jar by Factory5
Browse Zazzle for a different candy jar.
The shop features T-shirts, iPhone cases, laptop covers, dog clothes, baby clothes, luggage tags, notebooks, hats, cookie jars, mouse pads, clocks, the list goes on and on!
Here are some of my current products.
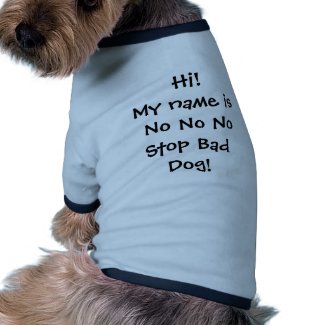
Cute Beagle Dog Puppy Treats Yum Dinner Time Love Candy Jar by Factory5
Browse Zazzle for a different candy jar.
Friday, August 23, 2013
How to Draw a Horse Head #1- Realistic Arabian
Ever wondered how to draw a realistic Arabian horse head? I show you how
to draw one quickly and easily in this new video tutorial! You can watch me go through, step-by-step, as I work from basic shapes to the final detailed image. I chose to draw an Arabian for this tutorial because of their beautiful, distinctive sloped muzzles. They're one of my favorite horse breeds!
The final drawing:
.jpg "Arabian Horse Sketch How to Draw")
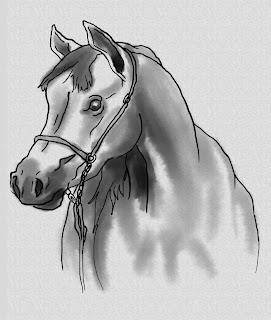
Both versions of the artwork were created in MyPaint. The reference is here.
The final drawing:
.jpg "Arabian Horse Sketch How to Draw")
My final artwork:


Thursday, August 22, 2013
How to Draw a Dog Face Tutorial #1
Here's a new drawing tutorial! This time, featuring my dog Corey. It's drawn in my favorite sketching program MyPaint (a free open-source program), but can be drawn in any other program or with pencil and paper. If you're a new artist, you may want to check out my How to Draw Animals post first. It outlines the steps you'd go through in drawing any animal in any pose.
In this tutorial I go one step further and add some values and highlights. Note that this is not true shading. All I'm doing is laying down values to indicate the different colors in Corey's fur and adding a few highlights so the drawing looks less flat. I didn't actually darken the sides of any of the shapes, so the the forms aren't as three-dimensional as a fully shaded drawing. This is one of many good ways to make a quick drawing.
The final drawing:
.jpg "Corey Beagle Basset Hound Drawing Artwork How To Tutorial")
In this tutorial I go one step further and add some values and highlights. Note that this is not true shading. All I'm doing is laying down values to indicate the different colors in Corey's fur and adding a few highlights so the drawing looks less flat. I didn't actually darken the sides of any of the shapes, so the the forms aren't as three-dimensional as a fully shaded drawing. This is one of many good ways to make a quick drawing.
The final drawing:
.jpg "Corey Beagle Basset Hound Drawing Artwork How To Tutorial")
Wednesday, August 21, 2013
How to Fix QuickTime Gamma Shift Graying Problem- Tutorial
For years I had problems with QuickTime graying out my videos. It would make whites gray, blacks not as dark as they should be, and would dull all other colors. This is actually a gamma shift problem. After trying unsuccessfully to QuickTime compress a render of a black Audi in a dark room I finally was able to find a solution to this problem. I realized that lots of other people are probably still struggling with this too, so I made a tutorial video. It's actually really easy to fix. I probably do it in less than ten seconds now. Just click, click, click, click, and my video's ready to go. Anyway, enjoy the tutorial!
Friday, August 2, 2013
WILWA #1- Lifting a Foot
What I Learned While Animating #1
Lifting a Foot
From my Experience Animating "Ballie Jump"
When I first animated Ballie lifting his foot to move back on the block I did it like he was taking a step. He lifted his foot high and didn't let it touch the ground until he was placing it down. It sounds fine in writing, but it looked off somehow. I finally figured out why by acting out the shot myself (another reason to film your own reference instead of just using YouTube).
The action looked strange because in real life people don't lift their feet- they lift their heel and the foot follows. It's true. Remember, even though you probably often animate IK legs, real legs are an FK chain. The foot doesn't move the leg, the upper and lower leg bones move the foot.You're probably sitting right now. Try moving your foot to the right a bit, enough that you have to lift your leg some. What did you notice? Your whole foot probably didn't lift off the ground. Your ankle lifted and your heel lifted, but your toes just dragged, still contacting the floor.
This is how people move their feet when just adjusting them or taking a small step. The larger the movement, the higher the leg, ankle, and foot lift. The smaller the movement, the more the toes drag. I believe that in forward movements it is more likely that the whole foot will leave the floor, simply because friction makes it hard to shove your foot forward without lifting it, but I'm sure that's not always true.
Now back to the shot. Ballie's step was tiny, but not small enough to just drag the toes. There had to be a little lift in the movement as he clears the ledge. Here's the moment from the animation. It has a small arc, and it's hard to see in the screenshots, so I drew up some diagrams to better show you what is happening.

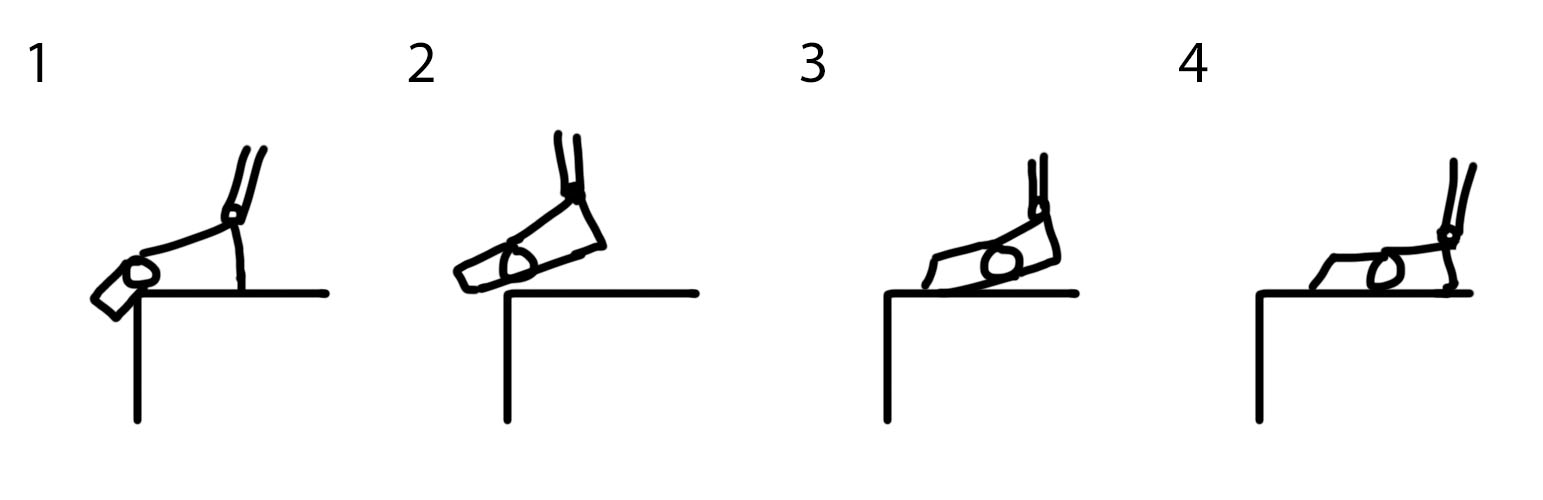
#1- The foot is on the ground and the toes rest on the ledge.
#2- The ankle lifts and the toes move up to clear the ledge. If the toes just dragged, they could get caught on the ledge, and Ballie doesn't want that.
#3- Now that his toes are clear, Ballie begins to conserve energy by letting his his foot go back to the ground, the toes dragging. Remember, everything always wants to conserve energy when possible.
#4- The toes drag back until the heel comes down in the new foot position.
And that's it. It's simple, but it took me some time to figure out that this was the right way to do this small movement.
Questions or comments? Post them below. I'll post another WILWA (not the best acronym, but not the worst) after I upload my next animation. The next one may be a dog one, so it could have some good quadruped animation tips/tricks.
Until next time!
Thursday, August 1, 2013
Ballie Jump Animation Test
In my previous post about Animation Mentor I mentioned that since AM is just one class, you may have time to practice other things, like rigging or drawing. Or you could be like me and just animate even more! I actually do draw as well, but I usually upload my drawings to my deviantART or Tumblr. But I may upload compilations of my drawing work here every once in a while.
Anyway, this is a jump animation I did in my free time. My class isn't using Ballie, but I wanted to try him out and this seemed like a great test to use him in. I'd love some feedback on it!
In my next post I'm going to start a new type of post that I call "What I learned while animating." I plan to do this for each animation I upload here. It should be helpful to other animators and will be good in case I ever forget whatever technique/trick I learned.
Until next time!
Anyway, this is a jump animation I did in my free time. My class isn't using Ballie, but I wanted to try him out and this seemed like a great test to use him in. I'd love some feedback on it!
In my next post I'm going to start a new type of post that I call "What I learned while animating." I plan to do this for each animation I upload here. It should be helpful to other animators and will be good in case I ever forget whatever technique/trick I learned.
Until next time!
Wednesday, July 31, 2013
Animation Mentor!
I'm an Animation Mentor student now! Actually, I have been for six weeks, I just happened to get around to writing this now. My demo reel got me waived out of the first class, so I'm in class 2: Animation Body Mechanics Basics.
It's been great so far. I've learned so much about animation and about the animation industry. My mentor (an ILM animator) gives really great critiques and I've seen great improvements in my work already. All the other students in the class with me are awesome, too. Not only are they as passionate about animation as I am, but they give great feedback. And of course, I get to use the great AM rigs, including the new Stella, Stan, and Sloan.

I highly recommend Animation Mentor to anyone who is considering becoming an animator, and I think that it is a perfect substitute to the traditional 4+ years at art college. As you can see on my About page, I did 3 years at two different art colleges, and while both were great and I learned many things, I do think that AM provides a more streamlined and detailed animation education.
That last part, the amount of detail, is what I especially like about AM. We don't just learn how to animate a walk cycle by copying from the poses in The Animtor's Survival Kit. We learn the science and fine details behind it. The lectures even include lessons from a physiologist describing why we walk the way we do. It's that kind of knowledge that helps make good animation become great.
I know that some people's concern about AM is that they think #1- they'll only learn animation, and #2- all AM graduates animate the same. While it is true that the character and animal animation tracks don't teach modeling/texturing/rigging, etc. it's not like those are things you can't learn on your own. There are tons of free and paid resources online that can teach you about those subjects. After all, AM is only one class at a time. If you're at a traditional art college you would be dealing with 3-5 classes a week. So at AM you should have plenty of time to do your classwork, have a job, and practice some extra things on the side if you want (though my mentor did warn us against becoming "jacks of all trades, but master of none"). Also, you do have to draw as an AM student, so it's not like you'll never pick up a pencil. There aren't any official class lessons about drawing, but you'll naturally improve because of the weekly sketchbook assignments, and you can improve even faster if you sketch in your free time.
And as far as all AM graduates animating the same, that's only true if animating the same means making great animation. One of the first things my mentor said in our first Q & A was that we could tell him what style we were going for in our shots and he'd critique us accordingly. Some students choose to animate in a more cartoony style, and some more realistically. We are not being taught to animate in the same way, we are just being taught to animate well, and then we can adjust our work to our stylistic preferences. If you know how to animate well, meaning you understand the principles and techniques, you can switch between styles depending on the project. I may take a few days to transition from usually working in a cartoony style to working in a realistic one, but it's not like you have to go learn a whole different thing. Animation is animation, it's just how you set the poses, timing, and spacing that changes the style.
So what I generally wanted to say with all this is that I'm very happy to now be an AM student. And if you are like I was for years, thinking "Should I go to Animation Mentor even though I won't get a college degree?" my answer is yes, you should. In this field, degrees don't matter. Skill does. You can go to the fanciest animation college in the world, but if an AM student applying for the same job as you can animate better, they'll get the job. But whether you go to AM or to art college, just keep practicing and having fun with your work and you'll be fine.
Until next time!
It's been great so far. I've learned so much about animation and about the animation industry. My mentor (an ILM animator) gives really great critiques and I've seen great improvements in my work already. All the other students in the class with me are awesome, too. Not only are they as passionate about animation as I am, but they give great feedback. And of course, I get to use the great AM rigs, including the new Stella, Stan, and Sloan.
I highly recommend Animation Mentor to anyone who is considering becoming an animator, and I think that it is a perfect substitute to the traditional 4+ years at art college. As you can see on my About page, I did 3 years at two different art colleges, and while both were great and I learned many things, I do think that AM provides a more streamlined and detailed animation education.
That last part, the amount of detail, is what I especially like about AM. We don't just learn how to animate a walk cycle by copying from the poses in The Animtor's Survival Kit. We learn the science and fine details behind it. The lectures even include lessons from a physiologist describing why we walk the way we do. It's that kind of knowledge that helps make good animation become great.
I know that some people's concern about AM is that they think #1- they'll only learn animation, and #2- all AM graduates animate the same. While it is true that the character and animal animation tracks don't teach modeling/texturing/rigging, etc. it's not like those are things you can't learn on your own. There are tons of free and paid resources online that can teach you about those subjects. After all, AM is only one class at a time. If you're at a traditional art college you would be dealing with 3-5 classes a week. So at AM you should have plenty of time to do your classwork, have a job, and practice some extra things on the side if you want (though my mentor did warn us against becoming "jacks of all trades, but master of none"). Also, you do have to draw as an AM student, so it's not like you'll never pick up a pencil. There aren't any official class lessons about drawing, but you'll naturally improve because of the weekly sketchbook assignments, and you can improve even faster if you sketch in your free time.
 |
| Some of my AM Sketches. Circled poses I chose to recreate with Stella. |
And as far as all AM graduates animating the same, that's only true if animating the same means making great animation. One of the first things my mentor said in our first Q & A was that we could tell him what style we were going for in our shots and he'd critique us accordingly. Some students choose to animate in a more cartoony style, and some more realistically. We are not being taught to animate in the same way, we are just being taught to animate well, and then we can adjust our work to our stylistic preferences. If you know how to animate well, meaning you understand the principles and techniques, you can switch between styles depending on the project. I may take a few days to transition from usually working in a cartoony style to working in a realistic one, but it's not like you have to go learn a whole different thing. Animation is animation, it's just how you set the poses, timing, and spacing that changes the style.
So what I generally wanted to say with all this is that I'm very happy to now be an AM student. And if you are like I was for years, thinking "Should I go to Animation Mentor even though I won't get a college degree?" my answer is yes, you should. In this field, degrees don't matter. Skill does. You can go to the fanciest animation college in the world, but if an AM student applying for the same job as you can animate better, they'll get the job. But whether you go to AM or to art college, just keep practicing and having fun with your work and you'll be fine.
Until next time!
Sunday, January 27, 2013
New Model- White Rhino
After several weeks of work, I am happy to present to you my new model- a white rhinoceros!

He has to be my best model to date! That's because I made a work in progress thread for him over on BlenderArtists.org and got a lot of great feedback and help. I should have begun posting over there ages ago! This is what he looked like when I first posted.

Believe it or not, I thought he was almost finished then! The base model actually stayed pretty much the same throughout the revisions, though I did make some changes based upon critiques. What the people over at BlenderArtists helped me with the most was the normal map, displacement map, uv map, sculpting, and they motivated me to rig him. The sculpting part was very new to me, never having sculpted then baked a displacement map before, but it made a big difference in the amount of detail I was able to put on the rhino. Though next time I think I'll sculpt in the beginning, then retopo and bake a normal map, because I think that would be easier to set up.
Here's a close up of his face.

And a side view.

Here are some wireframes.


Here's his rig.

And here's a turntable.
As always, you can get this guy here. He's available in BLEND, OBJ, and FBX formats.
I'm very happy with how this rhino turned out! And I'm excited to put what I learned to use on my next model. I still haven't decided what I'll make next, but when I do I'll make a thread for it over at BlenderArtists.org. Here's my profile for over there.
Until next time!

He has to be my best model to date! That's because I made a work in progress thread for him over on BlenderArtists.org and got a lot of great feedback and help. I should have begun posting over there ages ago! This is what he looked like when I first posted.

Believe it or not, I thought he was almost finished then! The base model actually stayed pretty much the same throughout the revisions, though I did make some changes based upon critiques. What the people over at BlenderArtists helped me with the most was the normal map, displacement map, uv map, sculpting, and they motivated me to rig him. The sculpting part was very new to me, never having sculpted then baked a displacement map before, but it made a big difference in the amount of detail I was able to put on the rhino. Though next time I think I'll sculpt in the beginning, then retopo and bake a normal map, because I think that would be easier to set up.
Here's a close up of his face.
And a side view.
Here are some wireframes.
Here's his rig.
And here's a turntable.
As always, you can get this guy here. He's available in BLEND, OBJ, and FBX formats.
I'm very happy with how this rhino turned out! And I'm excited to put what I learned to use on my next model. I still haven't decided what I'll make next, but when I do I'll make a thread for it over at BlenderArtists.org. Here's my profile for over there.
Until next time!
Thursday, January 10, 2013
Several Cool Updates
Hi again, everyone! Remember how last time I said I really wanted to focus on my modeling, texturing, and lighting skills? Well, I just got done doing a lot of practice with those last two. I went through an intense learning weekend where I learned a lot about composition, lighting, and Cycles. In fact, I learned so much that I decided to update all of my old models (except for the Bunny and Bobcat). I've given them all new materials to allow them to render in Cycles, and I've exported them all into .fbx format! I'm especially excited about that last part, because now I can use one of my favorite rigs, my great white shark, in Maya!
I'm also very excited about the updates because of how snazzy all my models look with their new materials and Cycles' better way of rendering. I don't know why I stuck with Blender Internal for so long, I should have switched to Cycles the day it came out! Anyhow, I thought you all might be interested to see the contrast between my old renders and my new renders of the same models. Keep in mind that a lot of the sub-par quality of the Blender Internal renders comes from me just not knowing enough about materials and lighting, something that I've improved on a lot (though I've still got tons to learn). I know of many people who can make stunning renders with Internal, so it's not like it's a bad renderer.
Anyway, here are the images! Old images on the top, new images on the bottom.


I'm also very excited about the updates because of how snazzy all my models look with their new materials and Cycles' better way of rendering. I don't know why I stuck with Blender Internal for so long, I should have switched to Cycles the day it came out! Anyhow, I thought you all might be interested to see the contrast between my old renders and my new renders of the same models. Keep in mind that a lot of the sub-par quality of the Blender Internal renders comes from me just not knowing enough about materials and lighting, something that I've improved on a lot (though I've still got tons to learn). I know of many people who can make stunning renders with Internal, so it's not like it's a bad renderer.
Anyway, here are the images! Old images on the top, new images on the bottom.
Great White Shark

I tried to recreate the pose of the original. I love how the lighting in the new one shows off the shark's jaw musculature.
Queen Anne Wing Chairs

I didn't like how the old version had no feeling of presence. I used what I learned about composition and focal length (I went a bit lower than the traditional 35 mm) to create a much more impressive looking scene in the new version.
Jade Canine


This is the only case where I still really like the Blender Internal version. A lot of jade does look like the new version, just like a lot looks like the old version, but I just think all the color variation in the old version looks cool.


Cartoony Hammerhead Shark

I like how the highlights are more defused in the new version. I changed the pose to point the other direction because I realized having it point the other way was pointing the viewer away from the next images.
Screwdrivers and Screws

These renders are probably the most similar of the bunch. But I think the bottom one has better lighting and a better composition.
Wine and Bar Glasses

Major change with this one. The biggest is probably the end of the dark blue lighting. And the bottles have some nice reflections going on.
So that's it! Now that I've finished this, I'm going to go back to making new models. I don't think I'll set them up for Blender Internal anymore, though. I read that development on it was discontinued years ago, anyway.
As always, you can get all of these models here, but now you can get them in FBX format, along with the usual OBJ and BLEND.
Until next time!