I recently saw the trailer for Disneynature's "Bears," and ever since have been inspired to draw bears. They're such cool animals. They're massive creatures, and can be quite ferocious, but can also be so loving and kind. I'd love to animate one, because they also have a unique gait.
So since I'm so fascinated with bears right now, I decided to make a drawing tutorial on how to draw a brown bear's face in a 3/4th view. I've also collected a number of great bear artworks to help inspire your own bear drawings. Enjoy!
How to Draw a Brown Bear's Face- Easy Drawing Tutorial
Subscribe to me on YouTube for more drawing tutorials!
It's December, which means it's officially Christmas time! Since this is my favorite time of the year, I decided to make a post highlighting some great Christmas dog art. I've also made a tutorial on how to draw a cute cartoon Christmas dog. It would be a great little drawing to include on any Christmas cards you might be sending out this year! I'll be doing more Christmas themed tutorials and holiday art posts, so stay tuned!
How to Draw a Cartoon Christmas Dog- Easy Drawing Tutorial
Subscribe to me on YouTube for more drawing tutorials!
Today's drawing tutorials are a realistic a cute stylized puppy and a panting dog. The stylized one is perfect for beginners or kids, though the panting one isn't that difficult. It just takes a bit more attention to detail and the help of a photo reference. Be sure to check out my other dog art tutorials too!
Cute Puppy
1. Make a circle for the head and draw the center lines.
2. Draw the muzzle.
3. Add in the eyes and the top of the head.
4. Add the ears.
5. Add details.
6. Color. Don't forget a highlight on the nose!
Panting Dog
1. Make a circle for the head and draw the center line. The body is an oval shape.
2. Block out the muzzle, neck, and eye and ear placement.
3. Detail the muzzle and eyes.
4. Detail the bottom jaw and add the collar.
5. Detail the ears and neck.
6. Add some simple values and highlights.
The puppy was drawn in Flash and the panting dog was drawn in MyPaint.
Leave a comment if you have any questions! I hope this was helpful!
Just in case people who are following me on here aren't subscribed to me on YouTube, I thought I'd start uploading my art video tutorials here again, so they can see them. On top of that, I've made still image/written tutorials to accompany the videos, just in case you want to get the gist of them really quickly.
Most of my videos are recordings of me working through the artwork, so you might want to scrub through them to get a better idea of how the drawing was made. Image tutorials always make things look overly simple, which is why I think that video tutorials are generally better. But you have both to choose from here, so go with whichever you find most helpful! Click the images to see them at full size. And be sure to check out some of my other cat tutorials!
Cute Kitten
1. Make a circle for the head and draw the center line. The body is an oval shape.
2. Block out the muzzle and eye and ear placement.
3. Detail the muzzle and eyes.
4. Add in the fur and eyebrow ridges.
5. Detail the ears.
6. Add some simple values and a couple whiskers.
Grumpy Cat
1. Make a circle for the head and draw the center line.
2. Block out the muzzle, neck, and eye and ear placement.
3. Detail the mouth, nose, and eyes.
4. Add in the fur, eyebrow ridges, and lines to define the sides of the muzzle.
5. Detail the ears and neck.
6. Add some simple values.
Both of these were drawn in MyPaint.
Leave a comment if you have any questions! I hope these were helpful!
I have a Zazzle shop now! It's called Factory5. It's been open for a few weeks, so I've been able to fill it with a number of designs already. I'm making some products with text designs, and some with my original artwork. I add new products every week, so check back frequently!
The shop features T-shirts, iPhone cases, laptop covers, dog clothes, baby clothes, luggage tags, notebooks, hats, cookie jars, mouse pads, clocks, the list goes on and on!
Ever wondered how to draw a realistic Arabian horse head? I show you how
to draw one quickly and easily in this new video tutorial! You can watch me go through, step-by-step, as I work from basic shapes to the final detailed image. I chose to draw an Arabian for this tutorial because of their beautiful, distinctive sloped muzzles. They're one of my favorite horse breeds!
The final drawing:
My final artwork:
Both versions of the artwork were created in MyPaint. The reference is here.
Here's a new drawing tutorial! This time, featuring my dog Corey. It's drawn in my favorite sketching program MyPaint (a free open-source program), but can be drawn in any other program or with pencil and paper. If you're a new artist, you may want to check out my How to Draw Animals post first. It outlines the steps you'd go through in drawing any animal in any pose.
In this tutorial I go one step further and add some values and highlights. Note that this is not true shading. All I'm doing is laying down values to indicate the different colors in Corey's fur and adding a few highlights so the drawing looks less flat. I didn't actually darken the sides of any of the shapes, so the the forms aren't as three-dimensional as a fully shaded drawing. This is one of many good ways to make a quick drawing.
Sorry for the lack of posts lately. As those of you who follow me on other sites may know, a lot has happened in the last few months. I transferred out of the Savannah College of Art and Design to the Academy of Art University (which I am doing completely online) and also adopted a new dog, a Basset Hound mix named Corey. Both were great decisions, but more on them in another post.
Today I just wanted to show you guys my newest models. I haven't been able to make much personal work, CG or otherwise, lately because of adjusting to a new college and then adjusting to a new dog. But things have started to fall into a more predictable sort of schedule, so I was able to find the time to make these models.
I made a slotted screwdriver (AKA flat-head), a Phillips screwdriver (AKA cross-head), a slotted screw, and a Phillips screw. The screws are accurately sized to the screwdrivers.
While these may not be that exciting to look at, they were rather challenging to make. On top of simply re-learning Blender yet again (I keep forgetting things as I continue to use Maya for school), I also had to learn about the screw modifier, hard surface modeling, and how to make the Phillips tip. Also, I tried to pay a lot of attention to the materials and rendering. I really want to improve in those two areas because no matter how well made a model is, its materials, textures, and rendering will decide how nice it actually looks as a finished product.
As usual, you can get these models on TurboSquid in .obj and .blend formats. They are packaged as a set.
This is the last part of this how to draw cats tutorial series. Last time I covered how to draw cat paws, and before that I gave a tutorial on how to draw cat faces/heads. I also made some how to draw cats video tutorials. Today I'm going to cover how to combine cat heads and paws with cat bodies to create cat poses. Let's get to it!
How to Draw Cat Bodies in Poses
Art Type: Traditional or Digital
I'm Using: Photoshop CS4 and an Intuos 4
I used references to guide these drawings. I suggest using references as well, especially if you're drawing an animal that you haven't practiced with much, or if you want a realistic style.
You can click the images below to see them larger.
How to Draw a Cat Sitting
Draw the basic shapes to form the head, chest, torso, and rear. Keep in mind that cats are longer than they are tall. They are also very graceful, so are best drawn with curving lines in mind.
Add the guide lines to the face and add the ears, muzzle, and eye.
Add the legs and tail. You can't see the hind leg on the other side of the body.
Either half erase your guide drawing, or draw on a new layer if working digitally. Detail the face.
Detail the body. Don't forget the little lines on the paw facing us that show where the claws retract.
Erase the guide drawing.
How to Draw a Cat Lying Down
Draw the basic shapes to form the head, chest, torso, and rear. Remember that cats are longer than they are tall.
Add the guide lines to the face and add the ears, muzzle, and eyes.
Add the legs and tail. Draw through the shapes to make placing the legs on the other side of the body easier.
Either half erase your guide drawing, or draw on a new layer if working digitally. Detail the face.
Detail the body. Don't forget the little lines on the paws facing us that show where the claws retract. Erase the guide drawing.
How to Draw a Cat Standing
Draw the basic shapes to form the head, chest, torso, and rear. Remember that cats are longer than they are tall.
Add the guide lines to the face and add the ears, muzzle, and eyes. This breed of cat (Siamese) has a muzzle that is slightly longer than usual.
Add the legs and tail. Draw through the shapes to make placing the legs on the other side of the body easier. Don't forget the dew claw on the raised front leg.
Either half erase your guide drawing, or draw on a new layer if working digitally. Detail the face.
Detail the body. Erase the guide drawing.
So that's it for the how to draw cats tutorials! I'll wrap the week up tomorrow by featuring some great cat art.
Last time I covered how to draw cat faces/heads. I also made some how to draw cats video tutorials. Today I'm going to give a tutorial on something much more simple: cat paws. Unlike dog paws, which can come in a variety of shapes, cat paws are pretty much all the same.
How to Draw Cat Paws Tutorial
Art Type: Traditional or Digital
I'm Using: Photoshop CS4 and an Intuos 4
I used references to guide these drawings. I suggest using references as well, especially if you're drawing an animal that you haven't practiced with much, or if you want a realistic style.
You can click the image below to see it larger.
Draw the basic shapes. The paw is best represented by a shape like an oval.
Add the guide lines to divide the paw into toes. Make the line in the middle go all the way down, so you can be sure the paw is pointing the right way. If the claws are extended, single lines help to guide you when drawing them in detail in the next step.
Either half erase your guide drawing, or draw on a new layer if working digitally. Add the details. The trick to making cat paws look "right" is using curves and keeping the shapes soft and smooth, like real cat paws. When the claws are retracted, there are little areas on the paws where there is no fur, leading to those holes and lines in the front of the paws. Note that the claws are positioned more toward the inside edges of the toes, not in the middles. Don't draw the claws too long. These are cats, not tigers. Erase the guide drawing and you're done!
I know this was pretty short, but as you can see, cat paws aren't complicated. Next time I'll discuss a more involved drawing subject: cat bodies and poses.
Now that I've got the dog site up and running, I thought it would be fun to cover something totally opposite to dogs: cats! This week is cat week. I'm going to cover how to draw cat heads/faces, paws, and bodies, then wrap the week up with a best of cat art post.
If you haven't taken a look at my "How to Draw Animals" post, you might want to. I also made some how to draw cats video tutorials. You may find some helpful tips in those that you can apply to your cat drawings.
How to Draw Cat Faces/Heads Tutorial
Art Type: Traditional or Digital
I'm Using: Photoshop CS4 and an Intuos 4
I used references to guide these drawings. I suggest using references as well, especially if you're drawing an animal that you haven't practiced with much, or if you want a realistic style.
You can click the images below to see them larger.
How to Draw a Cat Face/Head- Front View
Draw an oval (ovals are more accurate representations of cat skulls than circles).
Draw the guide lines. The inside edges of the eyes connect to the inside edges of the ears.
Either half erase your guide drawing, or draw on a new layer if working digitally. Add oval eyes with a bit of a slant near the inside corners. Don't forget the tear ducts.
Add the nose and muzzle. Lines on the side of the muzzle help keep it from looking flat.
Add the ears.
Add the fur and details like the brow ridges and shading on the eyes. Erase the guide drawing. You can add whiskers if you want, but they are not necessary and can make your drawing look more cluttered if done wrong.
How to Draw a Cat Face/Head- Side View
Draw an oval.
Add the guide lines. The inside edge of the eye connects to the inside edge of the ear. Don't make the muzzle too long or it will look like a dog.
Either half erase your guide drawing, or draw on a new layer if working digitally. Add the eye and tear duct.
Add the muzzle. Let it transition gracefully into the forehead, giving the cat a smooth profile.
Add the ears. Notice how the other ear is offset due to perspective.
Add the fur and details like the brow ridges and shading on the eyes.
Erase the guide drawing.
How to Draw a Cat Face/Head- 3/4 View
Draw an oval.
Add the guide lines. At this angle, it is very important to get the horizontal and vertical guide lines right, or your cat may not wind up at the angle you want. The inside edges of the eyes connect to the inside edges of the ears.
Add the eyes and draw in the side of the face. You can't see the tear duct on the right eye due to the angle.
Add the muzzle. Keep a square shape in mind as you draw it. This will make it wind up looking properly 3-dimensional.
Add the ears. Notice the detail on the inner edge of the left ear (your right as you face it). This adds to the realism and is one of the cool shapes you can find in reference photos.
Add the fur and details like the brow ridges and shading on the eyes.
Erase the guide drawing.
I hope this was helpful! Tomorrow I'll cover how to draw cat paws.
Take some time off from all your hard creative work with these interactive word search puzzles I made (with art related words, of course)! I'll get back into discussing serious art topics tomorrow. You can make your own puzzles like these here. Click on a letter to begin, drag your cursor over the word, then click on the last letter to end the selection (it should get crossed out in the word bank). It looks like whatever runs these puzzles is a little buggy, but you should still be able to have some fun. Enjoy!
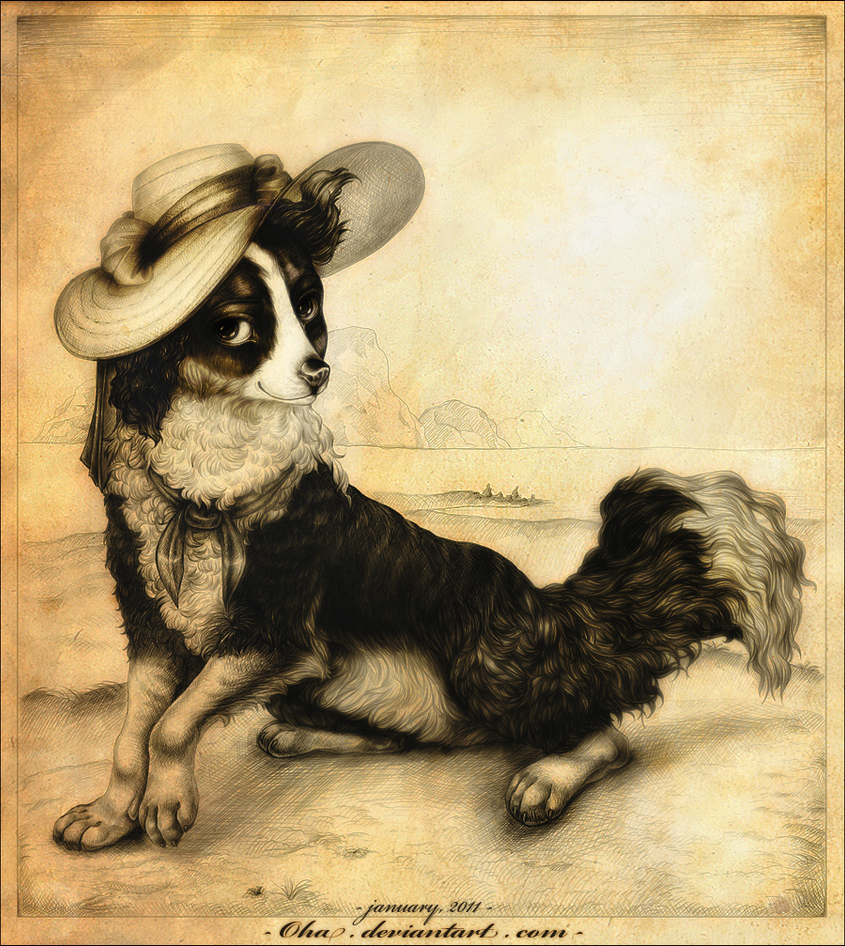
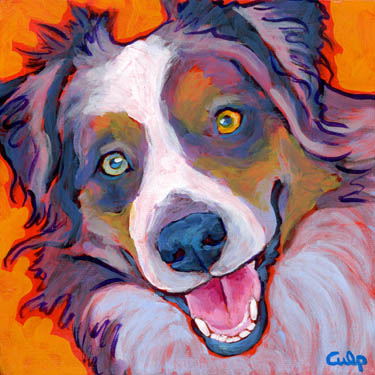
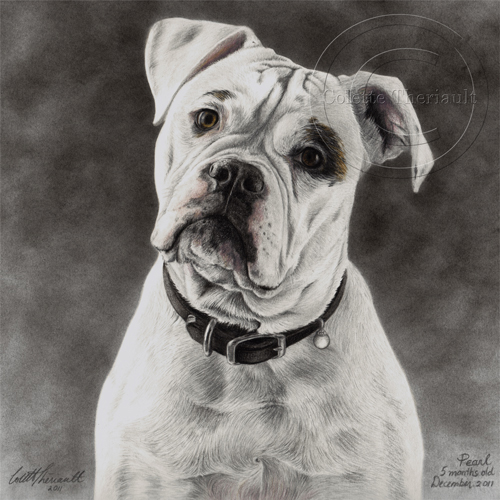
Now that I've covered how to draw animals, how to draw dogs (Part 1, Part 2), and listed 10 great dog art tutorials I found, I'm going to end this dog themed week with some inspirational images. Some of these artists are classical dog drawing masters, while others are living artists. Make sure to follow the link on any images you like to see what else the artist has to offer. Enjoy!
So I hope this was inspirational! There are tons of other great dog artists out there, so I may have to do a post like this again someday. Until then, you can always follow my Pinterest board "Inspiring Images" where I pin all the great art I come across.


.jpg "How to Draw a Realistic Dog Panting")

.jpg "How to Draw Sketch Grumpy Cat Art Tutorial")


.jpg "Arabian Horse Sketch How to Draw")

.jpg "Corey Beagle Basset Hound Drawing Artwork How To Tutorial")